
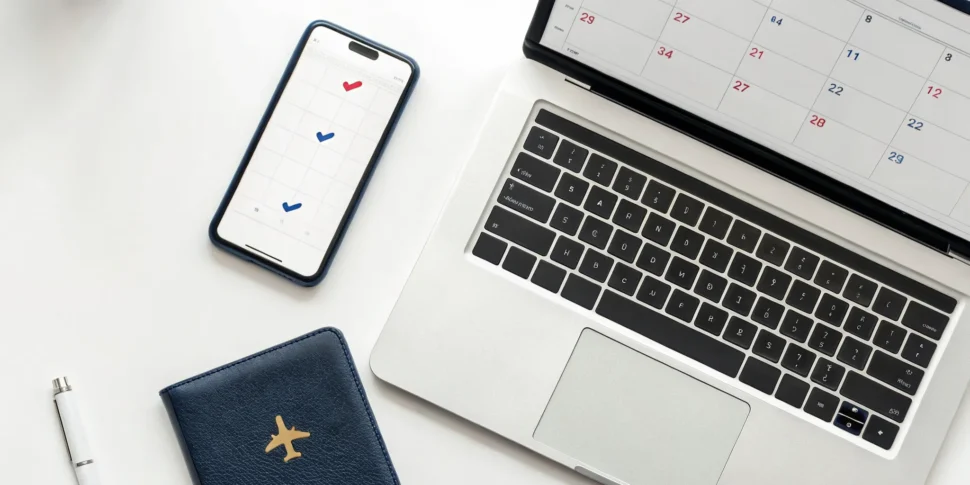
After you’ve filled out the forms and paid the fees, the next big step is getting your appointments on the calendar. This part of the journey involves two separate dates: a quick visit for your biometrics and the main consular interview. The usa visa scheduling portal is your gateway to securing these crucial appointments. Knowing how to use the system correctly and what to expect at each visit can make all the difference. This guide will not only show you how to book your appointments but also prepare you for what happens when you get there, helping to reduce any anxiety.
Key Takeaways
- Nail the Basics First: Your application’s success starts with the fundamentals. Correctly choose your visa type, fill out the DS-160 form with total accuracy, and save the confirmation page; you’ll need it to book your appointments.
- Schedule Both Appointments Correctly: Booking your visa interview is a two-step process. You’ll use the official scheduling portal to book a quick biometrics visit for your photo and fingerprints, and then you’ll schedule your main consular interview for a later date.
- Be Strategic with Your Timing: Appointment slots can be scarce, so planning is everything. Check the official U.S. Department of State website for current wait times at your consulate, apply as early as you can, and log into the scheduling portal often to catch any earlier openings from cancellations.
Getting Started: Your First Steps for a U.S. Visa
Applying for a U.S. visa can feel like a huge project, but it’s much more manageable when you break it down into a few key actions. Before you can even think about scheduling your appointment, you need to lay the proper groundwork. Getting these initial steps right will set you up for a much smoother process and save you from headaches down the road. Think of it as building a strong foundation for your application, where every piece needs to be in place before you can build the next level.
The first phase involves three main tasks: figuring out exactly which visa you need, gathering all your required paperwork, and paying the application fee. Each step is essential for moving forward and they must be done in order. For example, you can’t schedule an interview without a fee receipt, and you won’t know which documents to collect until you’ve identified your visa type. If you’re feeling unsure about what your trip requires, getting expert guidance on visa services can help clarify your path from the very beginning. Let’s walk through what you need to do to get started on the right foot.
Find Your Visa Type
Your very first move is to determine the correct visa category for your trip. The purpose of your travel dictates the type of visa you need to apply for, whether you’re visiting for a short vacation, a business conference, or long-term work. The U.S. offers many different visas, and choosing the right one is critical. Applying for the wrong category can lead to an automatic denial, forcing you to start the entire process over again. Take the time to understand if you need a tourist visa (B-2), a business visa (B-1), or another type that fits your specific situation.
Gather Your Documents
Once you know which visa you’re applying for, you can start collecting your documents. While the exact requirements vary by visa type, every applicant will need a valid passport. If your passport is expired or you need a new one, handling your passport services should be your top priority. Beyond that, you’ll need to fill out the DS-160 application form and provide supporting paperwork. Pay close attention to detail here. Common mistakes often involve providing inconsistent information across different forms or forgetting a required document. Double-check everything to ensure all your answers are accurate and complete before you move on.
Pay the MRV Fee
Before you can schedule your visa interview, you must pay the non-refundable Machine Readable Visa (MRV) fee. This is the standard application processing fee required for most nonimmigrant visa types. You will typically pay this fee through the official U.S. visa services website for your country of residence. After you complete the payment, you will receive a receipt. Be sure to save this receipt, either as a digital file or a physical copy. You will need the number from this receipt to prove you’ve paid and to unlock the ability to schedule your biometrics and consular interview appointments. Without it, you simply can’t move forward.
How to Fill Out Form DS-160
The DS-160 is the foundation of your U.S. visa application. It’s a detailed online form where you’ll provide all your essential information to the U.S. Department of State. Think of it as your official introduction to the consular officer, and first impressions matter. Accuracy is everything here, so my best advice is to take your time, answer every question truthfully, and double-check your work before submitting. A small mistake, like a typo in your name or a wrong date, can lead to significant delays or even require you to start the process over. We want to avoid that.
This form collects everything from your personal details and travel plans to your work history and security background. It’s comprehensive, but don’t feel overwhelmed. The information you provide here will be used by the consular officer during your interview to verify your eligibility, so consistency between your form and your answers is key. The system will time out after a period of inactivity, so remember to save your application frequently as you go. Let’s walk through the form section by section so you know exactly what to expect and can fill it out with confidence.
Enter Your Personal and Travel Details
First up, you’ll enter your personal and travel information. This is where you select the type of visa services you need and provide the basics about who you are. Have your passport right next to you for this part. You’ll need to enter your full name exactly as it appears on your passport, along with your passport number, date of birth, and nationality. You will also detail your travel plans, including your purpose of travel to the U.S. and your intended arrival date. Check every entry for typos before moving on. A simple error in your birth date or passport number can create a major headache down the line.
Provide Your Work and School History
Next, the form will ask for your employment and education history. You will need to list your previous employers and the schools you’ve attended, including their names, addresses, and the dates you were there. I recommend gathering this information before you even start the form; pull up your resume or LinkedIn profile to make it easier. This section helps the consular officer understand your background and your strong connections to your home country. Be thorough and honest. If you have any gaps in your employment history, just be prepared to explain them if the topic comes up during your interview.
Answer the Security and Background Questions
This section consists of a series of “yes” or “no” questions about your background. They cover security, criminal history, and previous immigration issues. It’s absolutely critical to answer every single question truthfully. Read each one carefully before you select your answer. Answering “yes” to a question doesn’t automatically mean your visa will be denied, but being dishonest about it almost certainly will. Inconsistent answers between this form and what you say in your interview are a major red flag. If you have a complicated history, it’s often best to get professional guidance on how to handle your application.
Submit Your Form and Save the Confirmation Page
Once you’ve completed all the sections, you’ll review your answers one last time, digitally sign, and submit your DS-160. After you submit, a confirmation page with a barcode will appear. This page is extremely important. You must save and print it, as you will need the confirmation number on it to schedule your visa appointment. I suggest you save it as a PDF, print a couple of physical copies, and even email it to yourself for safekeeping. You cannot proceed with booking your appointments for services like Global Entry or a tourist visa without this confirmation page.
Create Your Visa Appointment Account
After you’ve submitted your DS-160 form, the next major step is creating an account on the official U.S. visa scheduling website. This online profile is your command center for the rest of the application process. It’s where you will pay your application fee, book your appointment dates, and receive updates on your visa status. Think of it as the central hub that connects your application form to the actual interview. It’s important to be just as careful here as you were on your DS-160, since all the information needs to match perfectly. A simple typo can lead to delays, so take your time and double-check every entry before moving forward.
Choose the Right Scheduling Portal
First things first, you need to make sure you’re on the correct website. The U.S. Department of State uses a specific scheduling portal for applicants depending on the country they are applying from. Using the wrong one will prevent you from booking an appointment at your local embassy or consulate. To find the right portal, start by visiting the official website of the U.S. Embassy or Consulate in your country. They will provide a direct link to the authorized service provider for scheduling appointments. This ensures you are using the legitimate platform and protects you from fraudulent sites. It’s a simple check that saves you a lot of potential trouble down the line.
Set Up Your Profile and Add Your DS-160 Number
Once you’re on the correct portal, you’ll be prompted to create a new user account. This process is straightforward and involves entering your personal details, such as your name, passport number, and contact information. During this setup, you will be asked to enter your DS-160 confirmation number, which is the barcode number from the confirmation page you saved. This step is critical because it links your submitted application directly to your appointment profile. Be sure to copy and paste this number carefully, as any mistake can prevent the system from finding your form, forcing you to start over or causing significant delays in your application process.
Pay the Fee and Keep Your Receipt
Before you can schedule your appointments, you’ll need to pay the non-refundable Machine Readable Visa (MRV) application fee. The scheduling portal will guide you to a payment page with several options, which often include online bank transfers or cash payments at designated banks. After you complete the payment, you will receive a receipt with a unique transaction number. It is absolutely essential that you save this receipt. You will need the receipt number to activate the appointment calendar on the portal. Furthermore, you may be required to bring a copy of the payment receipt to your appointment as proof of payment. You can find the current visa application fees on the Department of State’s website.
How to Schedule Your U.S. Visa Appointment
Once your DS-160 is submitted and your profile is created, it’s time to schedule your appointments. Yes, that’s plural. You will book two separate appointments: one for biometrics and one for the consular interview. The online scheduling system will guide you through booking both at the same time. This part can feel a little stressful, but it’s a straightforward process once you know what to expect. If you run into any complex situations or need help managing the details, our team is always here to assist with our expert visa services. Let’s walk through how to get these crucial dates on your calendar.
Book Your Biometrics Appointment
First, you will schedule your biometrics appointment at a Visa Application Center (VAC). This is a quick, non-intimidating visit where you’ll have your fingerprints scanned and a photo taken. This step is mandatory for most visa applicants and helps confirm your identity before the main interview. The scheduling portal will show you available dates and times for the VAC appointment first. You must book this appointment before you can select a time for your consular interview, so think of it as the first official step in your in-person visa process.
Book Your Consular Interview
After you’ve secured a time for your biometrics, the portal will prompt you to schedule your consular interview. This is the main event, where you will speak directly with a consular officer at the U.S. Embassy or Consulate. The officer will ask questions about your trip, your background, and your ties to your home country to determine your eligibility. You’ll choose your interview slot from the available dates that follow your biometrics appointment. Be sure to leave enough time between the two, though they are often scheduled a day or two apart.
Schedule for Your Family or Group
If you’re applying with your family, you can schedule your appointments together. In the scheduling portal, you’ll find an option to add dependents. Simply click to add a new family member and enter their details, including their DS-160 confirmation number. This links your applications and ensures you can attend the appointments as a group. For larger groups of 10 or more people traveling together for the same purpose, there is a separate process for requesting a group appointment, so be sure to follow the specific instructions on the scheduling website.
Choose the Right U.S. Embassy or Consulate
You should schedule your appointment at the U.S. Embassy or Consulate in your country of permanent residence. Before you confirm your appointment dates, it’s a great idea to check the official Global Visa Wait Times page. This tool provides estimated wait times for an interview at different embassies and consulates around the world. Knowing this can help you manage your travel timeline and choose a location that works best for your schedule, especially if you have some flexibility. Keep in mind that wait times can change, so it’s always best to apply as early as possible.
Check U.S. Visa Appointment Wait Times
One of the most common questions I hear is, “How long will it take to get an appointment?” The answer can vary quite a bit, but the good news is that you aren’t completely in the dark. Knowing the estimated wait times can help you manage your travel plans and reduce a lot of stress. It’s all about knowing where to look and what to expect.
Several factors, from the time of year to the specific consulate you’re applying to, can affect appointment availability. But with a little planning and persistence, you can find a slot that works for you. If your travel is urgent, there are even pathways to request an earlier date. Let’s walk through how you can check wait times and what your options are for finding an appointment sooner.
How to See Current Availability
Planning your travel timeline starts with knowing how long you might have to wait for a visa interview. The U.S. Department of State offers a helpful tool where you can check global visa wait times. On this page, you can select the city where you’ll be applying to see the estimated interview wait time for different visa categories. Looking at this information before you book your appointment gives you a realistic picture of the process. This allows you to plan accordingly and avoid any last-minute surprises with your travel dates. It’s a simple step that makes a big difference.
What Affects Wait Times
You might notice that wait times can change, and you’re probably wondering why. Several things can influence the schedule at any given time. A high volume of applications, especially during peak travel seasons or ahead of major holidays, can create a backlog. Staffing levels at the U.S. embassy or consulate also play a big role in how many appointments are available. Sometimes, local conditions or unforeseen events can affect operations, too. While you can’t control these factors, being aware of them helps you understand why you might see fluctuations in nonimmigrant visa appointment availability and helps you set realistic expectations.
Tips for Finding an Earlier Slot
If your scheduled appointment is further out than you’d like, don’t lose hope. An earlier spot can open up due to cancellations, and being proactive is your best bet. The key is to be persistent. Regularly log back into your visa scheduling portal account to see if any new slots have become available. People change their plans all the time, so checking the portal frequently is your best strategy for grabbing an earlier date. It takes a little diligence, but it can definitely pay off if you’re hoping to travel sooner. Think of it as being first in line when a spot opens up.
How to Request an Expedited Appointment
Sometimes, travel is for an urgent reason, like a medical emergency, a critical business meeting, or an unexpected family matter. In these situations, you may be able to request an expedited appointment. Each U.S. embassy and consulate has its own specific criteria for what qualifies as urgent travel. Your first step should be to visit the website of the specific consulate where you plan to apply to review their guidelines for expedited nonimmigrant visa appointments. If you meet the requirements, you can submit a request through the scheduling portal. Just be prepared to provide documentation that supports your reason for needing an earlier interview.
What to Expect at Your Appointments
Once you’ve scheduled everything, your appointments are the final steps in the process. For most U.S. visa applications, this involves two separate visits: one for biometrics and one for the consular interview. Knowing what to expect at each one can make the experience much smoother. Think of it as a chance to confirm your plans and provide the necessary information in person. Let’s walk through what happens at each stage so you can feel prepared and confident.
Your Biometrics: Fingerprints and Photos
Your biometrics appointment is a quick and straightforward part of the process. The main purpose is to collect your fingerprints and take a digital photograph. This isn’t an interview, so you can relax. It’s a standard procedure that helps confirm your identity and is part of the legal, security, and eligibility requirements for all applicants.
You’ll check in at a Visa Application Center (VAC) or an Application Support Center (ASC). When it’s your turn, an official will guide you through scanning your fingerprints and taking your photo. The whole thing usually takes less than 30 minutes. Just follow the instructions, and you’ll be done before you know it.
What to Bring to Your Biometrics Appointment
For your biometrics appointment, you only need a few key documents. It’s always best to carefully read the entire appointment notice you received, as it will list exactly what you need. Generally, you should plan to bring your current passport, your DS-160 confirmation page, and your appointment confirmation letter.
It’s just as important to know what not to bring. Most centers have strict rules against bringing in large bags, food, weapons, or any electronics, including your phone. To keep things simple, try to bring only your documents in a clear folder. Arrive a little early, but not too early, as you may not be allowed inside until your scheduled time.
Prepare for Common Interview Questions
The consular interview can feel like the most intimidating part, but it’s really just a conversation. For many, it represents the final hurdle in the visa journey. The consular officer’s goal is to verify the information on your DS-160 form and understand the purpose of your trip.
Be ready to answer questions about your travel plans, such as “Why are you visiting the U.S.?” and “Where will you be staying?” They may also ask about your job, family, and financial situation. The key is to answer honestly, clearly, and consistently. Practice answering these questions beforehand so you can respond with confidence. Think of it as simply telling your story.
What to Bring to Your Consular Interview
When you go to your consular interview, you’ll need to bring a complete file of your documents. This includes your passport, DS-160 confirmation page, appointment confirmation, and visa fee payment receipt. You should also bring all supporting documents that are relevant to your visa type. This could include a letter from your employer, bank statements, property deeds, or school transcripts.
Organize everything neatly in a folder so you can find what you need quickly. Also, keep in mind that the time on your notice is not your interview time; it’s the time you must be checked in at the embassy or consulate. Arrive on time and be prepared to wait.
Prove Your Ties to Your Home Country
One of the most important things you need to do during your interview is prove your “ties” to your home country. This means showing the consular officer that you have strong reasons to return home after your trip to the United States. Strong ties can include a stable job, close family relationships, property you own, or enrollment in a school.
Be prepared to discuss these connections and have documents ready to support your claims. Failing to demonstrate strong ties is one of the most common mistakes that can lead to a visa denial. The officer needs to be convinced that you intend to follow the rules of your visa and will not remain in the U.S. permanently.
What Happens After the Interview
At the end of your interview, the consular officer will tell you the outcome. There are generally three possibilities. If your visa is approved, the officer will keep your passport to place the visa inside. It will be returned to you later via courier. If your application is denied, the officer will explain why and return your passport to you immediately.
Sometimes, an application requires “administrative processing,” which means it needs further review. If this happens, you’ll be given instructions on what to do next. Decisions are made based on the Immigration and Nationality Act (INA), so the officer is simply following established guidelines. Whatever the outcome, listen carefully to the instructions you’re given.
How to Reschedule or Cancel Your Appointment
Plans change, and that’s completely fine. If you find yourself needing to reschedule or cancel your U.S. visa appointment, the process is usually straightforward. The key is to act promptly and follow the correct steps to avoid losing your application fee or causing unnecessary delays. Whether it’s a sudden work trip or a personal emergency, you have options. Here’s what you need to know to make the change smoothly and keep your visa application on track. If you run into any trouble, remember that our team is here to help with all your visa services needs.
Know When and How to Reschedule
The moment you know you can’t make your appointment, it’s time to act. To reschedule, you’ll need to log back into the visa scheduling portal where you first booked your slot. Once you’re in, you should see an option to either cancel or reschedule your existing appointment. The system will show you the currently available dates and times, allowing you to select a new slot that works for your schedule. It’s a good idea to have a few alternative dates in mind before you log in. The process is designed to be self-service, but remember that appointment availability can be limited, so it’s best to reschedule as soon as you can.
Understand Rescheduling Fees and Limits
Generally, your visa application fee (the MRV fee) is valid for one year from the date of payment, which allows you to schedule an appointment within that timeframe. Most consulates permit you to reschedule a certain number of times without paying a new fee. However, this limit can vary by country, so always check the specific rules for the embassy or consulate where you applied. If you need to reschedule a biometrics appointment, you must submit the request through your USCIS online account before the original appointment time. You’ll also need to provide a good reason for the change, as they want to ensure you’re serious about your application. You can learn more about preparing for your biometric services appointment directly from USCIS.
Avoid Common Rescheduling Mistakes
One of the most common mistakes happens when an applicant finds an error on their DS-160 form after scheduling an appointment. If you fill out and submit a new, corrected DS-160, you absolutely must update the new confirmation number in your visa appointment profile before you attend your interview. Simply bringing the new confirmation page to your appointment isn’t enough; the system needs to reflect the change. Failing to update this can lead to you being turned away at the consulate. This is exactly the kind of small but critical detail our visa services team manages, ensuring your application is accurate from start to finish.
Common Scheduling Mistakes to Avoid
Scheduling your U.S. visa appointment is a huge step, but a few common slip-ups can unfortunately send you right back to the beginning. The visa application process is incredibly detailed, and even a small error can cause significant delays or require you to start over. Knowing what these common mistakes are ahead of time is the best way to sidestep them completely. Let’s walk through the most frequent scheduling errors so you can approach your application with confidence and get it right on the first try.
Using the Wrong DS-160 Number
Your DS-160 confirmation number is the unique code that links your submitted application to your appointment. A surprisingly common mistake is accidentally using the wrong one when you go to schedule. This might happen if you started multiple applications or are using a number from an old, unsubmitted draft. When the number on your appointment confirmation doesn’t match the one on your final, submitted DS-160 form, it creates a mismatch that can cause major issues. Always double-check that you are using the barcode number from the confirmation page you saved after officially submitting your form. This simple check prevents you from having to cancel and reschedule your appointment.
Choosing the Incorrect Visa Category
U.S. visas are not one-size-fits-all. Each category, from tourist and business to work and student visas, has its own specific eligibility requirements and required documents. Choosing the wrong one is a critical error that often leads to an immediate denial. For example, if you plan to attend business meetings but apply for a tourist visa, the consular officer will likely deny your application. Before you even begin your DS-160, be absolutely certain about your reason for travel and select the correct visa type. If you’re unsure, getting expert advice on different visa services can save you from wasting time and money on a flawed application.
Submitting Incomplete or Inaccurate Information
Honesty and accuracy are non-negotiable on your visa application. Consular officers review your DS-160 form with incredible attention to detail, and any information that seems incomplete or untruthful can lead to delays or a refusal. This includes everything from simple typos in your name or passport number to more serious omissions, like failing to disclose a prior visa denial. Be sure to answer every question thoroughly and truthfully. Before you submit, review your entire application one last time to ensure all the information is correct and matches your supporting documents. Remember, the answers you give in your interview must also align perfectly with what you wrote on your form.
Forgetting to Check Wait Times
One of the most overlooked steps is checking the estimated appointment wait times at your chosen embassy or consulate. These times can vary dramatically depending on the location, season, and visa category. Some locations have openings within a few weeks, while others are booked solid for months. By not checking the official wait times before you start, you risk paying the application fee only to find that you can’t get an appointment that fits your travel schedule. Making this part of your initial research helps you set realistic expectations and plan your timeline accordingly, preventing a lot of last-minute stress.
Waiting Too Long to Apply
Many people think a visa application is a quick process, but this is rarely the case. The single biggest scheduling mistake is simply waiting too long to get started. High demand for U.S. visas means that interview slots can be scarce, especially during peak travel seasons. If you wait until a month or two before your intended travel date to begin, you may find that there are no available appointments. As soon as your travel plans start to take shape, you should begin the visa application process. This gives you plenty of time to fill out the forms correctly, gather your documents, and secure an appointment without the pressure of a looming deadline.
When to Use a Professional Visa Service
While you can certainly manage the U.S. visa application on your own, there are times when calling in an expert is the smartest move. Think of it as having a seasoned guide for a really important journey. If your travel plans are complex, your timeline is tight, or you simply want the peace of mind that everything is done right the first time, a professional service can be a game-changer. They are experts in the requirements and can spot potential issues you might miss.
The main benefit is avoiding common, frustrating mistakes. A simple error on your DS-160 form or forgetting a key document can lead to delays or even a denial. A professional service acts as your second set of eyes, reviewing every detail to ensure your application is accurate and complete before you submit it. This is especially helpful for anyone applying for specialized visa services, like for business or work, where the paperwork can be even more demanding. They handle the tedious parts, like scheduling appointments and preparing your document packet, which saves you a ton of time and stress.
This kind of support is particularly valuable if your situation isn’t straightforward. For instance, if you’ve had a visa denied in the past, are applying for a large family or corporate group, or have a multi-country itinerary, an expert can help you prepare a stronger case. They understand the nuances of immigration law and can offer personalized assistance tailored to your specific circumstances. Ultimately, using a service is about investing in a smoother, more confident application experience, letting you focus on planning your trip instead of worrying about the paperwork.
Frequently Asked Questions
What should I do if I find a mistake on my DS-160 after I’ve already scheduled my appointment? This is a common situation, so don’t panic. You will need to fill out a completely new DS-160 form to correct the error. Once you submit the new form, you will get a new confirmation number. The most important step is to then log into your visa scheduling profile and update your appointment details with this new DS-160 confirmation number. You must do this before your interview day, as simply bringing the new confirmation page with you is not enough.
Can I schedule my interview before paying the visa application fee? No, you cannot. The visa application process follows a strict order. Paying the non-refundable Machine Readable Visa (MRV) fee is the step that activates the appointment scheduling calendar on the official portal. After your payment is processed, you will use the receipt number to prove you have paid, which then allows you to see available dates and book your biometrics and interview appointments.
My appointment is scheduled much later than I hoped. Is there any way to get an earlier date? Yes, there are a couple of things you can do. The most effective strategy is to be persistent and log into the scheduling portal regularly to check for cancellations, as new slots can open up at any time. If your reason for travel is truly urgent, such as a medical emergency or critical business need, you can also formally request an expedited appointment. You will need to check the specific U.S. Embassy’s website for their criteria and provide documentation to support your request.
What is the single most important thing I need to prove during my consular interview? The most critical point you need to demonstrate is your strong ties to your home country. This means showing the consular officer that you have compelling reasons to return home after your trip, such as a stable job, close family, property ownership, or ongoing education. The officer needs to be confident that you intend to respect the terms of your visa and will not try to remain in the U.S. permanently.
Do I really need to bring all those supporting documents to the interview? Yes, you absolutely should. While the consular officer may only ask to see a few specific items, you never know which documents they will request. Having a complete and organized file with your financial records, employment letters, and other supporting paperwork shows that you are a serious and well-prepared applicant. It is always better to have the documents with you and not need them than to be asked for something you left at home.