
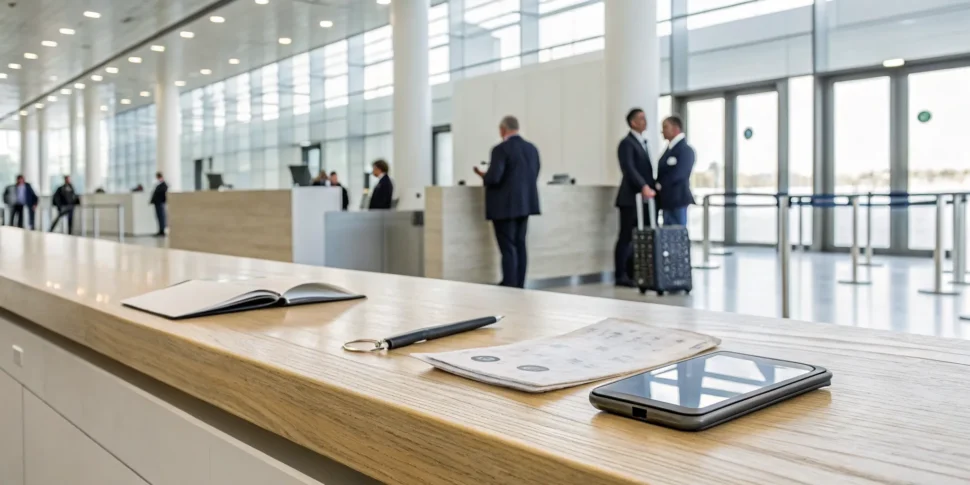
One of the most common reasons a passport application gets delayed is a simple mistake made right at the start. Maybe you signed the form too early or brought the wrong kind of document copy. This is exactly why Passport Acceptance Facilities exist. When you apply in person at one of these locations, you’re not just dropping off paperwork; you’re meeting with an agent whose job is to catch those small errors. Think of your local passport office or acceptance facility as your first line of defense against bureaucratic headaches. Knowing how to prepare for this appointment ensures your application gets a clean start, saving you from frustrating and costly delays.
Key Takeaways
- Your In-Person Appointment Requires Preparation: If you’re a first-time applicant, you must visit an acceptance facility. Bring your unsigned DS-11 form, original proof of citizenship and ID, photocopies of those documents, and two separate payment methods for the government and facility fees.
- Sidestep Common Application Delays: The most frequent mistakes are simple to avoid. Wait to sign your application until you’re with the agent, bring a check or money order for the State Department fee, and double-check that you have both the original and photocopies of your ID and citizenship proof.
- Match Your Timeline to Your Travel Date: Routine processing is fine for trips several months away, while expedited service works for travel in two to three weeks. For anything sooner, you’ll need to secure a hard-to-get agency appointment or use a professional service to handle the urgent submission.
What’s a Passport Acceptance Facility?
So you’ve heard the term “Passport Acceptance Facility,” but what exactly is it? Think of it as an official, local drop-off point for your passport application. These aren’t mysterious government buildings; they’re often places you already know, like a post office, public library, or a county clerk’s office. The U.S. Department of State authorizes these locations to accept passport applications on its behalf, making the process more accessible for everyone. This is the standard first stop for anyone applying for their first passport or for a child’s passport. Understanding what they do (and what they don’t do) is the key to a smooth application process.
Passport Office vs. Acceptance Facility: What’s the Difference?
The main thing to know is that an acceptance facility is where most people go for routine applications. If you’re a first-time applicant, applying for a minor under 16, or replacing a lost or stolen passport, you’ll be using Form DS-11 and visiting one of these locations. They are not the same as a Passport Agency or Center, which are reserved for travelers with confirmed international travel plans within 14 days. An acceptance facility simply verifies your documents and sends them off for standard processing. For many renewals, you can skip this step and mail your application directly. If you are deciding whether you qualify to renew online, read our guide to applying for a passport online before choosing a route, or review the passport services available for more complicated situations.
Services Offered at an Acceptance Facility
When you visit an acceptance facility, a designated agent is there to help you get everything right. Their primary job is to witness you signing your DS-11 application, which is why it’s so important not to sign it beforehand. The agent will also verify your identity by checking your photo ID, review your proof of U.S. citizenship, and confirm all your documents are in order before sealing them in an official envelope. This step helps prevent common mistakes that can cause major delays. As a bonus, many facilities also offer on-site passport photo services for an additional fee, which can save you a separate trip.
How to Find a Passport Acceptance Facility Near You
Finding a facility is simple. The U.S. Department of State has an official Passport Acceptance Facility Search Page where you can find locations by zip code. Once you have a list of nearby options, I recommend calling ahead. Be sure to ask a few key questions: Do they require an appointment, or do they accept walk-ins? What are their hours for passport services, which can be different from their regular business hours? And finally, do they offer photo services on-site? Getting these details sorted out before you go will make your visit quick and efficient, getting your application on its way without a hitch.
Your Passport Application Checklist
Walking into a passport acceptance facility prepared is the best way to ensure a smooth process. Think of it like gathering your ingredients before you start cooking; having everything in order saves you time and prevents a second trip. Getting your documents right is the most important part of the application, and it’s where small mistakes can cause big delays. If you’re feeling overwhelmed by the details, remember that our team can manage the entire passport services process for you. But if you’re tackling it yourself, here’s a simple checklist of everything you’ll need to bring.
Form DS-11 (But Don’t Sign It Yet!)
First up is the application form itself, Form DS-11. You can fill this out online and print it, or grab a copy at the acceptance facility. Whichever you choose, complete it using black ink and be sure to fill it out completely and accurately. The most important rule to remember is to not sign the form until you are in front of the acceptance agent and they instruct you to do so. Signing it ahead of time will invalidate the form, and you’ll have to start over. This form is required for all first-time applicants, minors, and adults whose last passport can’t be renewed by mail.
Proof of U.S. Citizenship
Next, you’ll need to prove you are a U.S. citizen. You must present an original or certified copy of your citizenship evidence; photocopies or digital images won’t be accepted. The acceptance agent will review your document and return it to you. Acceptable documents include a U.S. birth certificate that is state-certified and lists your full name and your parent’s full names. You can also use a previously issued, undamaged U.S. passport, a Certificate of Naturalization, or a Certificate of Citizenship. Make sure you have the correct, original document before you head to your appointment to avoid any issues.
A Valid Photo ID
You will also need to present a valid, government-issued photo identification to prove you are who you say you are. The most common form of ID is a current, undamaged driver’s license. Other acceptable IDs include a valid military ID or a government employee ID. The name on your photo ID should match the name on your application and your proof of citizenship. Be prepared to present the original ID and a photocopy of the front and back. This is also the stage where you’ll handle payments, so have your payment methods ready for both the government fee and the separate facility acceptance fee.
A Compliant Passport Photo
Your passport photo has to meet very specific government requirements, or your application could be delayed. The photo must be in color, taken within the last six months, and printed on matte or glossy photo-quality paper. It needs to have a plain white or off-white background with no distracting patterns or shadows. You should have a neutral facial expression or a gentle smile with both eyes open. A big one to remember: you cannot wear glasses in your photo unless you have a signed note from your doctor, which you must submit with your application.
Extra Steps for Minors
Applying for a passport for a child under the age of 16 involves a few extra but very important steps to establish parental consent. In most cases, the child and both parents must appear in person at the appointment. If one parent is unable to attend, they must provide a signed and notarized consent form, known as Form DS-3053. This form must be submitted along with a front-and-back photocopy of the non-applying parent’s government-issued photo ID. These rules are in place to protect children and ensure both legal guardians approve of the passport being issued.
How Much Will Your Passport Cost?
Let’s talk about money, because no one likes surprise fees when they’re already dealing with a government process. The total cost of your passport isn’t just one flat number; it’s a combination of a few different charges. You’ll have the main government application fee, a separate fee for the facility that accepts your paperwork, and a couple of optional add-ons if you need a photo or faster service.
Knowing these costs ahead of time helps you budget and ensures you have the right payment methods on hand for your appointment. The final amount can vary slightly depending on where you apply and what services you choose, but I’ll break down each component for you. This way, you can walk into your appointment feeling prepared and confident. For the most current pricing, you can always check the U.S. Department of State’s fee calculator to get a precise estimate based on your needs.
Government Application Fee
The largest part of your passport cost is the government application fee. This payment goes directly to the U.S. Department of State and is technically made up of two separate charges: the application fee and the execution (or processing) fee. This is the standard, non-negotiable cost for the government to review your documents, verify your identity, and print your official passport book or card. Every first-time applicant pays this fee, so it’s the main number to budget for when you start the process.
Facility Acceptance Fee
In addition to the government fee, you’ll pay a separate facility acceptance fee. This charge goes to the passport acceptance facility itself, like the post office or county clerk’s office where you submit your application in person. This fee covers their time and service for verifying your documents and identity and for sealing your application package to be sent securely to the State Department. This fee is paid separately, so be ready to make two distinct payments during your appointment.
Optional Photo Fees
If you show up to your appointment without a valid passport photo, don’t worry. Many acceptance facilities offer on-site photo services for an additional fee, which is usually around $15. This is a super convenient option if you’re short on time or just want to get everything done in one go. Of course, this is completely optional. You can save a few dollars by getting your photo taken ahead of time at a local pharmacy or photo studio, just be sure it meets all the strict government requirements for size, background, and expression.
Expedited Service Add-On
If you have a trip planned and the routine processing time is cutting it too close, you can choose to expedite your application. For an additional $60 paid to the State Department, your application gets moved to a faster processing queue, significantly reducing your wait time. This is a great choice for anyone with travel plans within the next few months. For even more urgent situations or if you simply want an expert to handle the entire process, using a dedicated passport service ensures everything is done quickly and correctly from the start.
How to Pay Your Fees
This is one of the most important details to get right. The main government application fee must be paid with a check or money order made payable to the “U.S. Department of State.” They do not accept credit cards, debit cards, or cash for this portion, so come prepared. Forgetting this can bring your appointment to a halt. The separate facility acceptance fee, on the other hand, typically has more flexible payment options. Most facilities accept credit cards or money orders for their fee, but it’s always a good idea to call ahead and confirm their accepted payment methods.
Applying for Your Passport, Step by Step
Alright, you’ve got your checklist, you know what a passport acceptance facility is, and you’re ready to get this application process started. It might feel like a lot of moving parts, but I promise it’s manageable when you take it one step at a time. Think of it less like a mountain to climb and more like a simple recipe to follow. The key is to be meticulous. Dotting your i’s and crossing your t’s now will save you from frustrating delays later.
This five-step guide is designed for anyone applying for their first U.S. passport. It also applies if your last passport was issued when you were under 16, if it was lost or stolen, or if it expired more than five years ago. For these situations, you have to apply in person. If you’re simply renewing, you can likely handle it by mail, which is a much easier process. But if you’re here, you’re probably gearing up for an in-person appointment. Let’s walk through exactly what you need to do to make your appointment a success. And remember, if the details start to feel overwhelming, our team is always here to manage the entire passport services process for you.
Step 1: Fill Out Form DS-11
First things first, you need to complete the application form. For a new passport, this is Form DS-11. You can find this form on the U.S. Department of State website, where you have the option to fill it out online and print it, or print a blank PDF to fill out by hand with black ink. My advice? Fill it out online. The form filler tool ensures you don’t miss any required fields and prints a neat, scannable barcode. Here’s the most important tip for this step: do not sign the form yet. You must wait and sign it in person when the acceptance agent instructs you to. Signing it ahead of time will invalidate the form, and you’ll have to start over.
Step 2: Gather Your Documents
Next, you’ll play a bit of a treasure hunter and gather your supporting documents. You need to prove two things: that you’re a U.S. citizen and who you are. For proof of citizenship, you’ll need an original or certified copy of your birth certificate, a previous U.S. passport, or your Certificate of Naturalization. For your identity, a valid driver’s license or other state-issued photo ID will work. Don’t forget to make high-quality, single-sided, black-and-white photocopies of both the front and back of these documents. You’ll submit the photocopies, but you must present the original documents for the agent to inspect.
Step 3: Book Your Appointment
With your paperwork in order, it’s time to get on the calendar. Most passport acceptance facilities operate by appointment only, so walking in is rarely an option. You can find a list of nearby locations, which are often post offices, public libraries, or county clerk offices, by using the State Department’s Passport Acceptance Facility Search Tool. I recommend booking as far in advance as possible, especially if you’re applying during peak travel seasons like spring and summer, as appointment slots can fill up weeks or even months ahead of time. Securing your spot early is a great way to reduce pre-travel stress.
Step 4: Submit Everything in Person
On the day of your appointment, you’ll bring your entire application package to the facility. This includes your unsigned Form DS-11, your original proof of citizenship and ID, the photocopies of those documents, your passport photo, and your payment for the fees. The acceptance agent will review all your materials, verify your identity, and then ask you to take an oath and sign your DS-11. They’ll seal everything into an official envelope to be sent to the State Department for processing. This in-person step is non-negotiable for first-time applicants, as it’s a critical security measure. If you need help with complex travel plans, our visa services can also be handled with the same level of care.
Step 5: Track Your Application Online
Once your application is officially on its way, the waiting period begins. But you won’t be left completely in the dark. The State Department offers a convenient way to check your passport status online. You can start checking about two weeks after you apply. You’ll just need to enter your last name, date of birth, and the last four digits of your Social Security number. The tracker will show you when your application is in process, when it’s been approved, and when your new passport has been mailed. It’s a simple way to keep tabs on your document and get a better estimate of when you can expect it to arrive.
Do You Need an Appointment?
For most people applying for a new passport, the short answer is yes, you will need an appointment. The days of simply walking into a government office for any service are largely behind us, and passport applications are no exception. This is especially true if you’re a first-time applicant or need to use an in-person service for any reason.
The U.S. Department of State confirms that most official passport acceptance facilities may require appointments for their services. These locations, which are often post offices, public libraries, or local government offices, have specific hours and staffing dedicated to processing passport applications. An appointment system helps them manage the flow of applicants and ensure they have enough time to verify each person’s documents carefully. Because every facility sets its own rules, your first step should always be to look up your chosen location online or call them directly to confirm their appointment policy. This simple check can save you from a wasted trip and a lot of frustration.
The Deal with Walk-Ins
You might be wondering if you can take a chance and just show up. While some facilities may occasionally accept walk-ins if they have a no-show or a slow day, it’s not something you should count on. Many locations strictly prioritize applicants with pre-booked appointments and may turn walk-ins away, especially during busy travel seasons. Relying on walk-in availability is a gamble that can easily backfire. To avoid disappointment, the best approach is to call the facility ahead of time to ask about their policy. It’s better to spend a few minutes on the phone than to get all your documents together only to be told to come back another day.
How to Snag an Appointment When They’re Scarce
If you log on to book an appointment and see a calendar with no available slots, don’t panic. First, the best strategy is always to be proactive. The USPS recommends you apply for your new passport at least several months before any planned international travel. This gives you plenty of time to find an appointment that works for you without the last-minute stress. If you’re in a pinch, try checking the booking portal at odd hours, like early in the morning or late at night. People cancel and reschedule all the time, so new appointments can pop up when you least expect them. A little flexibility and persistence can often help you find a spot.
How Long Will It Take to Get Your Passport?
This is the million-dollar question, isn’t it? After you’ve carefully gathered your documents and submitted your application, the waiting game begins. The time it takes to get your passport back can vary quite a bit depending on the season and current application volumes. It’s always a smart move to check the U.S. Department of State website for the most up-to-date processing times before you apply.
Generally, you have two main timelines to choose from: routine and expedited. It’s important to remember that these timeframes begin the day your application is received at the processing center, not the day you mail it or hand it over at the acceptance facility. You’ll also need to factor in mailing times for the application to get there and for your new passport to get back to you. Let’s break down what you can expect from each option so you can choose the right one for your travel plans.
Routine Processing
Think of routine processing as the standard, most common path. Routine processing for a passport application typically takes four to six weeks. This is the default speed and the most budget-friendly choice, as it doesn’t involve any extra rush fees. This option is perfect if your international trip is still a few months away or if you’re getting a passport “just in case” without a specific departure date on the calendar. Just be sure to give yourself a generous buffer. Counting on this timeline means you can relax, knowing you’ve given the process plenty of time without paying extra for speed.
Expedited Processing
If your travel plans are a bit more urgent, you’ll want to look into expedited processing. If you need your passport sooner, expedited processing is available and usually takes about two to three weeks. This service comes with an additional government fee, but it can be a real lifesaver when the routine timeline is just too long. This is the ideal option for those who have flights booked in the next month or two. To prevent any unexpected delays, it’s critical that your application is flawless. Using a dedicated passport service can help ensure every detail is correct, giving you peace of mind while your application is being processed quickly.
Need a Passport ASAP? Here’s What to Do
We’ve all had that moment of panic: you’ve booked a dream trip, but your passport is expired or missing, and the routine processing time just won’t cut it. Take a deep breath. While it’s a stressful situation, you do have options for getting a passport quickly. However, the process is completely different from a standard application. When you need your passport sooner, you can’t just apply at a local acceptance facility. Instead, you must go directly to a regional passport agency or center, and getting an appointment can be a real challenge.
These agencies are specifically for travelers with confirmed international travel in the very near future. You’ll need to prove your trip is happening soon and work with a separate, often frustrating, appointment system. It requires organization, persistence, and a bit of luck to secure a spot. If the thought of managing one more thing feels overwhelming, remember that you don’t have to do it alone. Using a dedicated passport service can take the pressure off. Experts can handle the logistics and ensure your application is flawless, giving you the best chance of getting your passport in time for your flight.
Proving Your Urgent Travel
To qualify for an appointment at a passport agency, you can’t just say you need to travel soon; you have to prove it. This is because these limited slots are reserved for people with confirmed, non-refundable travel plans within 14 calendar days. You’ll need to bring printed proof of your itinerary, like a flight confirmation, cruise ticket, or hotel reservation that shows your name and the international travel dates. Without this documentation, you won’t be able to submit your application at the agency. This requirement ensures that the most urgent cases are prioritized, so be sure to have all your paperwork in order before you even try to book an appointment.
Booking a Last-Minute Agency Appointment
Securing a last-minute appointment at a passport agency can feel like winning the lottery. There are very few available, and they get snatched up almost instantly. Appointments are released at a specific time each day, and you have to call the National Passport Information Center to book one. You can only make an appointment if your international travel is within 14 calendar days. If you have an even more urgent situation, like needing to travel within 3 business days for a non-emergency reason, you should still check the official government site for guidance. Because these appointments are so hard to get, this is where a professional service can be a lifesaver.
Help for Life-or-Death Emergencies
If you’re facing a life-or-death emergency that requires immediate international travel, there is a specific process to follow. The U.S. Department of State defines this as a serious illness, injury, or death of an immediate family member abroad. For these heartbreaking situations, you must call the National Passport Information Center to request a special appointment. You will need to provide proof of the emergency, such as a death certificate, a statement from a mortuary, or a signed letter from a hospital or medical professional. While you can’t plan for these events, knowing that there are emergency passport options can provide a small bit of relief during a difficult time.
Common Pitfalls to Avoid
Applying for a passport can feel like a big deal, but the process is straightforward when you know what to expect. Still, a few common slip-ups can cause unnecessary delays, forcing you to reschedule your appointment and start over. Knowing what to watch out for ahead of time can make your visit to the acceptance facility go smoothly and get your application on its way without a hitch. From signing forms too early to showing up with the wrong payment type, these are the most frequent mistakes applicants make and how you can easily sidestep them. By being prepared, you can save yourself the headache of a return trip to the post office and feel confident walking into your appointment. Think of this as your cheat sheet for a stress-free application day.
Signing Your Application Form Too Soon
It’s tempting to have everything completely filled out and signed before you walk into your appointment, but hold off on that signature. You must sign your DS-11 application form in person, directly in front of the passport acceptance agent. They need to witness you signing the document as part of the identity verification process. If you sign it beforehand, the form will be considered invalid, and you’ll have to fill out a brand new one on the spot, which can be a hassle if you’re short on time. To be safe, just complete all the other fields and leave the signature line blank until the agent gives you the green light.
Forgetting or Bringing Incomplete Documents
One of the quickest ways to get your application delayed is by showing up without the right paperwork. It’s a simple mistake, but it happens all the time. Before you leave for your appointment, run through a final checklist to ensure you have everything you need: your unsigned DS-11 form, original proof of U.S. citizenship (like a birth certificate), a valid government-issued photo ID, and a photocopy of both the front and back of your citizenship and ID documents. Forgetting even one of these items, or just bringing a copy when an original is required, will mean you can’t submit your application and will have to reschedule.
Not Realizing You Can Renew by Mail
If you’re renewing your passport, you might not need an in-person appointment at all. Many people don’t realize they can handle their renewal entirely by mail, which saves a lot of time and effort. You generally qualify if your most recent passport is undamaged, was issued when you were 16 or older, and is less than 15 years old. If you meet the criteria, you can skip the trip to the acceptance facility. For an even simpler process, using a service to manage your passport services can ensure your renewal is handled correctly without you having to manage the details yourself.
Being Unprepared for Fees and Payment Types
Passport application fees can be confusing because you have to make two separate payments. The first payment goes to the U.S. Department of State, and it must be made by check or money order only; they do not accept cash or credit cards for this portion. The second payment is the execution fee, which goes to the acceptance facility itself. This facility may accept credit cards, but many don’t, so it’s wise to bring cash or a separate check. You can use the State Department’s Passport Fee Calculator to confirm your exact costs and avoid any payment-related surprises at your appointment.
When to Skip the Line and Use a Passport Service
Applying at a local acceptance facility works perfectly fine if your travel plans are far in the future and your application is straightforward. But let’s be real, life doesn’t always follow a neat timeline. Sometimes you need a passport fast, or you just don’t have the mental bandwidth to deal with one more complicated process. In these cases, using a dedicated passport service isn’t a luxury; it’s a smart, strategic move that saves you time and stress. Think of it as calling in an expert to handle the details so you can focus on planning your actual trip.
So, how do you know when it’s time to call for backup? Here are a few common situations where a professional service is your best bet.
Your Travel Date Is Just Around the Corner
This is the most common reason people turn to a passport service. If your trip is weeks away instead of months, you simply can’t apply at a standard acceptance facility like a post office. They don’t have the authority to process applications faster than the government’s routine or expedited timelines. A registered passport courier service, on the other hand, can submit your application directly to a passport agency on your behalf, dramatically cutting down the wait time. If you have an urgent need, professional passport services are designed to handle these tight deadlines.
You Want to Avoid Bureaucratic Headaches
Finding an available appointment at a passport acceptance facility can feel like winning the lottery. Even when you get one, you might face long lines, unexpected closures, or the risk of having your application rejected for a tiny error. A passport service eliminates this entire ordeal. They manage the submission process for you, ensure your paperwork is flawless before it’s submitted, and save you from spending hours at a government office. It’s a simple way to trade a major hassle for a smooth, predictable experience.
Your Travel Plans Are Complicated
Are you planning a multi-country trip that requires several visas? Or maybe you’re applying for a work visa with a long list of specific requirements. When your travel involves more than just a simple passport application, having an expert on your side is invaluable. A good service can help you coordinate your passport and visa services to ensure everything is processed in the right order and on time. They catch potential problems you might not see, preventing costly delays that could derail your entire itinerary. It’s peace of mind in a process that often has very little.
Frequently Asked Questions
Can I just walk into a post office to apply, or do I really need an appointment? You will almost certainly need an appointment. While a few facilities might take walk-ins on a slow day, it’s a risky bet. Most locations that accept passport applications, like post offices and libraries, require you to book a time slot in advance. This system helps them manage their schedule and give each applicant the attention needed to review documents properly. My best advice is to find a facility near you and call them directly to confirm their appointment policy before you go.
My old passport expired. Do I have to do all of this in person again? Not necessarily, and this is great news for many people. If your most recent passport is in good condition, was issued within the last 15 years, and you were at least 16 years old when you got it, you can likely renew it by mail. This allows you to skip the in-person appointment entirely. You just need to fill out a different form (DS-82), mail it in with your old passport, a new photo, and the fee. It’s a much simpler process for eligible applicants.
What’s the difference between paying for expedited service and using a passport service? This is a great question because the two are often confused. Paying the government’s expedited fee simply moves your application into a faster processing queue, cutting the wait time down to a few weeks. A professional passport service, on the other hand, manages the entire process for you. We ensure your application is flawless to prevent any delays, and for urgent travel, we can submit your documents directly to a passport agency, which is a much faster method than what’s available to the public.
Is the application process different for my child’s passport? Yes, applying for a passport for a minor under 16 involves a few extra, very important steps. To protect against international parental child abduction, the law requires consent from both parents. This means that in most cases, the child, you, and the other parent must all attend the appointment in person. If one parent cannot be there, they must provide a signed and notarized consent form along with a copy of their ID.
The payment process seems complicated. Can you simplify it for me? It can feel confusing, but it’s simple once you know the rule. You will make two separate payments at your appointment. The main application fee must be paid to the “U.S. Department of State” with a personal check or money order. They do not accept credit cards or cash. The second, smaller fee is the execution fee, which you pay directly to the facility. Most facilities are more flexible and may accept credit cards or cash for their portion, but it’s always smart to call ahead and ask what payment methods they take.